DVD
audio Tools
Light GUI for Windows
To install, execute Customize.exe in Hplex\GUI
See install file in GUI folder for details.
Installation options
Light GUI offers the following installation options for right-click
menus ('context handlers') :
DVD-Audio disc
DVD-Hybrid (Efficient)
DVD-Hybrid (Mirror)
DVD-Hybrid -- Custom
DVD-Video audio disc
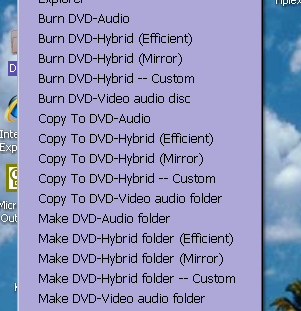
The "Make folder" options create folders with subfolders g1, g2, ...,
up to g9.
The "Copy To " options copy audio files selected by right-clicking to
the appropriate folders.
The "Burn" options launch Hplex with the corresponding parameters.
Installing Light GUI
The installation procedure prompts each type of intall option:
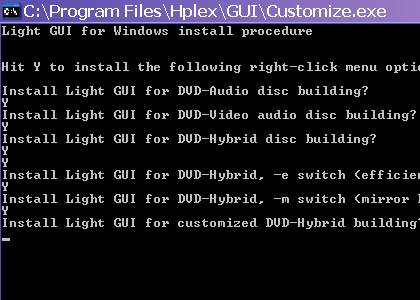
Reply Y ("yes") to install and N otherwise.
Each "yes" reply installs the following three right-click
context handlers:
Burn ....(type of disc)...
Make...(type of disc folder)...
Copy To...(type of disc)...
Then the installation procedure goes on to ask for a customized
DVD-Hybrid launch option.
Customizing a right-click option
An example is given on how to enter command line options: see Hplex
help or readmes on how to specify parameters.
A typical command line will include the type of DVD-Hybrid switch (-e,
-i, -m, -a/-v) and possibly input parameters (bit rate /
sample rate options):
-ba 24 -sa 48 -m %1
means "right-clicked folder %1" will be of type -m with audio bit rate
24 and sample rate 48 kHz.
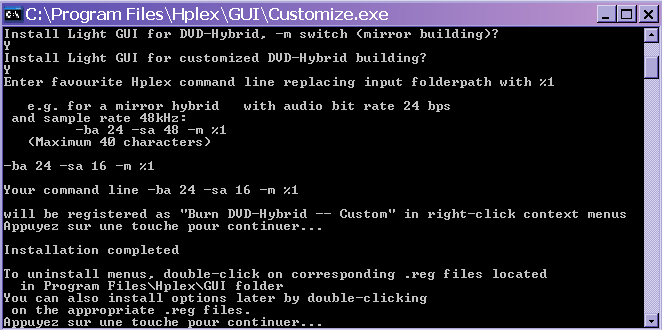
A message then indicates that the right-click menu
"Burn DVD-Hybrid -- Custom"
is generated for the entered command line, as in the screenshot below:
Instructions for use
You can now use Light GUI as follows.
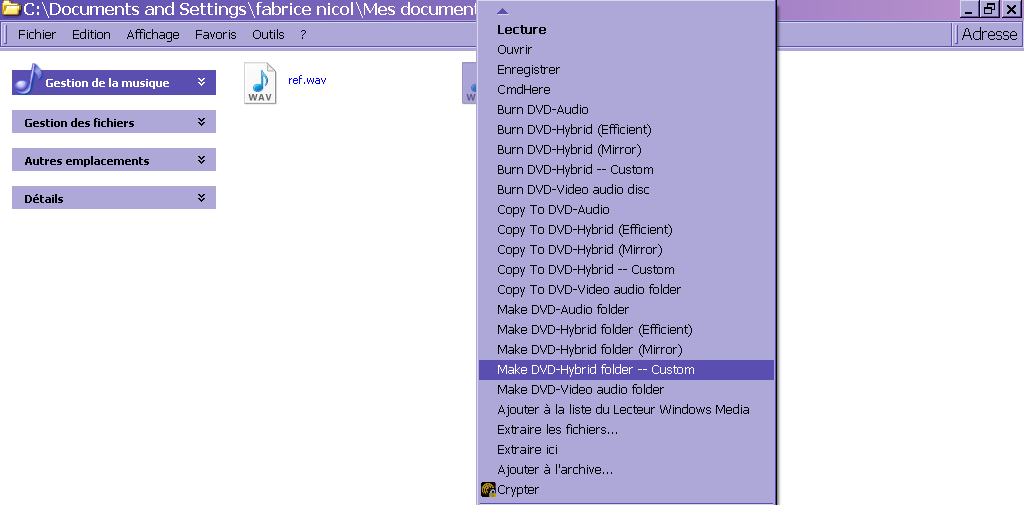
1. Right-click on any file in your audio folder
Select a "Make DVD...folder" option:
2. The output is a folder named DVDA, DVDV or DVDH, according to the option selected.
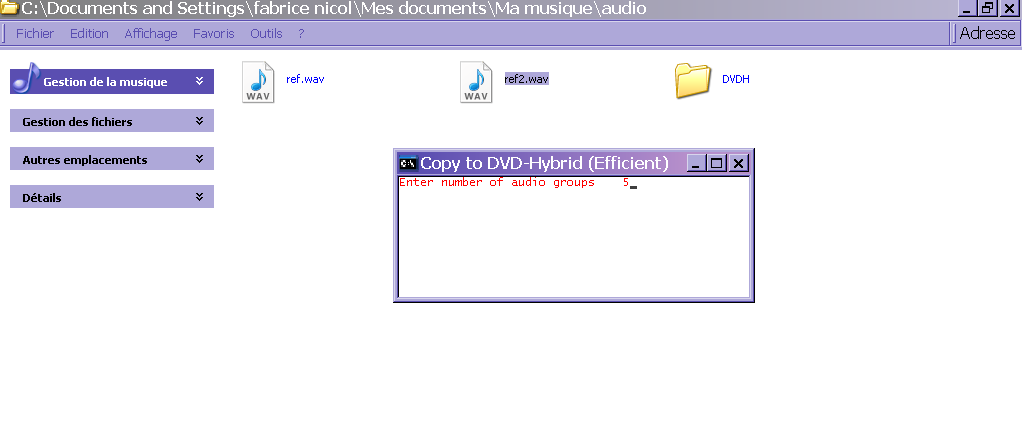
A pop-up batch windows opens with the prompt "Enter number of audio groups".
Enter a number between 1 and 9 then press Enter. The
screenshot below illustrates the option "Make DVD-H (Efficient)":
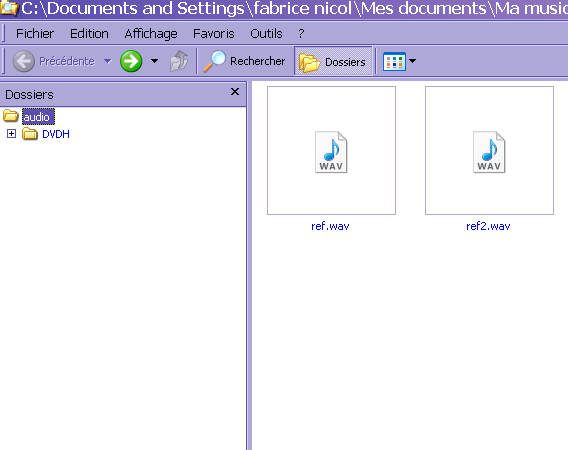
3. Now if Explorer is opened with an active tree frame, your audio
folder appears at the root of the explorer tree and the created
DVDA/V/H appears just below. Your audio files appear in the right-side
panel:
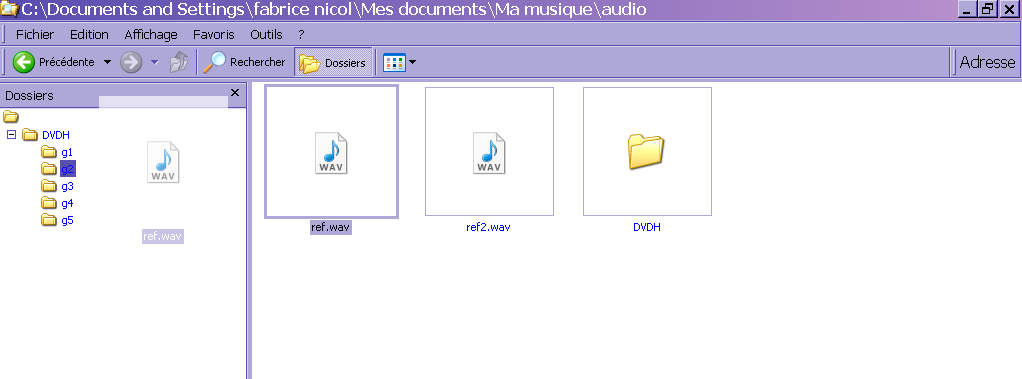
4. Press on the + sign to unwrap the DVDH folder then
drag-and-drop your files to subfolders g1, g2, ... which represent
audio/video groups/titlesets:
Alternatively, you can use the "Copy to DVD..." menu.
Right-click on the file to be copied. A batch window opens and requests
the number of the group (e.g. 3 for group g3) to which the file will be
copied.
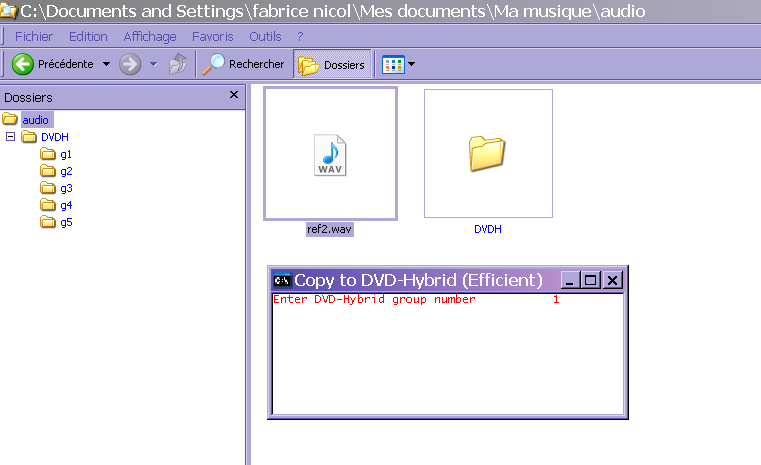
Press Enter: the file is automatically copied to the right group in the DVD folder.
5. When all files have been copied, use the "Burn DVD..." command.
Right-click on the DVD folder and launch Hplex as below:
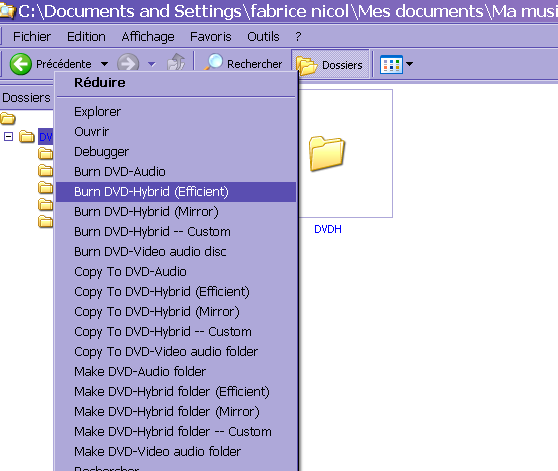
Hplex is launched with the right switch:
-D to launch dvda-author and burn a DVD-Audio
-L to launch Hplex and burn a DVD-Video
-e for an "efficient" DVD-Hybrid
-m for a mirror hybrid
or the customized command line (if previously created).
Below is a screenshot for an "efficient" DVD-Hybrid (all DVD-Video compliant files are burned to video zone and only them):
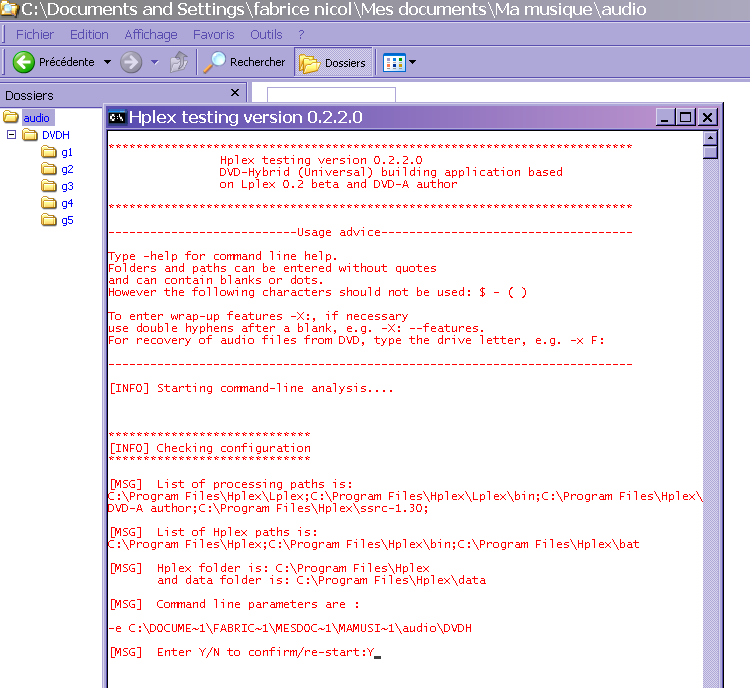
Check the command line parameters, enter Y (for "yes") and press Enter.
An ISO file will be created in the Hplex\bat folder.
If option -b yes or -b (burner name) is selected, a DVD will be automatically burned.
Made with NVU and GIMP


